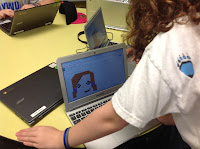
I created this project after seeing a post by Alice Keeler about resizing the cells in Google Sheets to be squares so then it could be used to create pixel art.
It takes three to four one-hour sessions for students to create the digital version, then another three to four one-hour sessions to transfer it to paper. In addition, it will take you three to four hours to cut all the pixels (1/2"). I created the pixel paper to glue on by enlarging a grid to 11x17 so the pixels became 1/2". This created a pixel limit of 34 tall and 22 wide. They have to keep this in mind as they build.
I began with a brief explanation of a pixel and showed examples of self portraits in pixels. These ranged from very basic to complex.
Students searched on Google for "pixel art self portrait" to reference when building their own self portrait. Despite all the examples they can follow, students tend to make their face round instead of oblong, so a lesson on face shape may be necessary.
Their first attempts were mostly basic, so I encouraged them to push toward more complex ideas like shading and more than one color for hair, which many did end up incorporating.
Once I approved their digital, they got to work on the paper. I had them start on the bottom edge with their shirt and build up one row at a time.
The first student that was done, added his name in pixels so others then followed.


